Tuesday, July 2, 2013

Pants Redo FREE Tutorial

I really wish I was more on top of it, but I literally had a last minute thought before the 4th of July to make my daughter something fun and patriotic to wear.  So as usual I saved it for last minute and have had to rush to get it done.  I called my sister-in-law up and asked her if she wanted to come over and sew some fun skirts for all of our girls for the 4th of July!  So we ventured out, and got going on it.
I am sure I am not the only one that has kids who ruin all their jeans!  I am all about re-use and re-purpose!!  So I wanted to make a jean skirt.  I get bored of all the skirts that people cut straight across and just add the ruffle.  So I decided that mine needed some extra flare.  I cut the jeans at a fun angle, and I LOVE it!  So fun!!  I also had the cute vintage fabric left over from my mom's house.  I stole it, and I'm proud!
Here are the instruction on how I put my skirt together.  I may be missing a step here or there due to lack of planning.  I was trying to hurry and get all three skirts done, and so I may be missing a picture.  I actually only have one skirt finished I have 2 more to get working on today.  These girls have to have their ruffles!!!  If I have missed any steps, please send me an email, and I can help you get through your skirt.
Here are our basic jeans.  I have made my daughter another skirt like this, and I think I even used her brothers old jeans for those.  So the jeans don't really matter where they come from, just an old pair with holes or that may be to small.
 

Cut the legs off like this.  I hope you can notice that one leg is cut longer and a slight curve is cut right at the crotch of the pants.

This is where I am missing some steps for you.  I don't have specific amounts for you to cut.  But I will tell you what I did for all three of your skirts and it worked wonderful.  I cut 24 strips total of each for all three girls (Used 3 on 1 skirt, 4 on another, and 5 on the last).  Cut your strips at 3" x width of the fabric for the ruffles.  Cut 2" x 20" for the under ruffle.

Sew edges together to make 12 large circles of ruffles and of under ruffle.

 This is where I am missing another couple pictures for a step.  Make sure to do a rolled hem at the bottom of the ruffles or surge them like I have.  The rolled hem looks way nicer, but I was in a hurry and surged all of the edges of mine.
To the top of each ruffle you will need to gather it.  Whether you choose to use a basting stitch, or gather it on your machine that doesn't matter.
Now to match the picture above!  I have pined the gathered edge of the ruffle to one edge of the under ruffle.  Then Sew.

 The top stitch isn't crucial to the skirt, but I always add a top stitch when I can.  I think it makes things look more crisp and professional.

 Adding the next layer.  To the top edge of the under ruffle, place the next ruffle on top with the next under ruffle on top of that and sew.  The right side of the bottom under ruffle is facing the wrong side of the second ruffle, and the right side of the second ruffle is facing the right side of the second under ruffle.

 Top stitch.  And then continue to add all the layers you will need for the length of your skirt.

I thought I had to add something more to the jeans so I cut out some starts, and then appliqued them to the jeans.  When sewing an applique, it is best to use some kind of a stabilizer.  There are so many stabilizers out there, but on the package it will tell you which one is for which fabric.

I didn't show it very good at all in this picture, but I added a gather stitch to the top under ruffle.  The top under ruffle is tucked underneath the jeans here and pinned down.

 Sew together.  I used a stitch that looks like this on my sewing machine.  I can't remember the name of the stitch.  But it is awesome!  It makes that thick stitch look that you see on all the jeans.  It doesn't sew 3 separate lines like you would think.  It sews 3 times directly on top of each stitch to make regular thread look nice and thick.  Way cute!!  I love this stitch.
AND YOU ARE DONE!!
Thanks for putting up with my poor instructions.  I hope your skirts turn out wonderfully!!  I would love to see pictures after you are done.  If you will share, send them to my email or to my flicker account -  http://www.flickr.com/groups/1449172@N23/


Here is a picture of the 1st skirt I made.  I used a sparkled ruffle trim and an eyelet trim for it.  She wore this skirt until it was to tight and short!
 
HAPPY 4TH OF JULY!  I am thankful for the freedom that I have from my country.

Thursday, June 27, 2013

Chevron Maxi Dress 1/2 OFF Coupon Code

It is out!!  The Chevron Maxi Dress Pattern is out!!  The testers all did such an awesome job!  And I loved working with them.
Thanks again Jamie and Marisa.  Here are pictures of how their dresses turned out.

I am offering a coupon code for this pattern until July 3rd.  Go my Etsy Shop and after adding the pattern to your shopping cart enter coupon code CHEVRON12 to get 1/2 off the pattern price.

Thursday, June 20, 2013

Sewing With Knit Fabrics, How To


Sewing knits can be very frustrating for a beginner seamstress.  Some people are so scared to sew on a knit fabric.  One of the scariest things with a knit fabric is how far they can stretch while sewing.  And sometimes they will stretch in all 4 directions!


Before you want to start your project on knit fabric, make sure you remember is to pre wash your fabric!!  Most knits will shrink, and it would be so sad to have it shrink after you have made your maxi skirt or what ever it is you are sewing.

Then check the needle on your sewing machine.  The needle should only be used for 8-10 hours of sewing.  After that it will not give you the quality that you deserve.  Needle also come in different sizes, so make sure to use a ball point needle.  To get specific, the reason why is a ball point needle slides off the fabric threads instead of piercing through them  If you use a sharper needle you may have snags or a run in your fabric.


The best stitch to use on your knits is a serged edge.  The reason why is because a seger gives a slight stretch in the way it sews.  Don't worry if you don't own a serger, most people don't.  Here are 2 suggestions for stitch choices on your sewing machine.  By using either of these stitches you will keep thread from breaking while stretching when worn.
Every sewing machine comes with a zig zag stitch wich will work great.
Some sewing machines offer a stitch for sewing on knits, that are even more wonderful.

            Zig Zag stitch looks like this 

            Knit stitch looks like this 

There is not much of a difference between the two.  The difference is that the knit stitch takes a stitch backwards to help for the stretching fabric.  Both will work just great.

Keep in mind when sewing with the zig zag stitch, stretch the fabric slightly while sewing.  Just a little pull towards you as you are feeding the fabric through your sewing machine.  If you pull to much, the fabric may start to gather and look awkward.  So remember to just pull slightly.  Below is a picture of me pulling on my machine with a zig zag stitch.


I actually love sewing on knits, and I love even more to wear them.  Once you find the confidence to sew on knit fabrics, you will love them.  There are so many different knits out there and right now I am loving how many cute ones I can find!!  I will post a few simple projects for you to give a try soon.  An infinity scarf if a perfect start and very simple to do, and also a maxi skirt.  If you are ever sewing with a knit and are frustrated send me an email.  Lets figure it out together!!

Wednesday, June 19, 2013

Chevron Dress Winner's

And the winner's are - 
Jamie Little
and
Marisa Corrigan
I am so excited!  That was the best turn out that I have ever had for a pattern tester!  I am so giddy! Both ladies have the pattern and will have it tested within a week.  Then the pattern will be out for sale!  I will post later today a few helps with sewing with knits.

Tuesday, June 11, 2013

Chevron Maxi Dress Pattern Tester and Free Pattern ~ Closed

Last summer I had my really good friend help me make a pattern for the cutest quilt ever.  I am so addicted to chevrons, they are so fun!!  As soon as I figure out all of our chicken scratched notes I will share with you the instructions on how we made this quilt.
We made my baby a quilt before he was born, and once that was done I wanted to sew something else with a chevron in it.  Another love of mine are basic maxi skirts.  They are so comfortable and versatile for most occasions.  So with these two things as inspiration, I set out to make this fun new sewing pattern for girls.  It is such a fun dress with a short cap sleeve and scoop neckline.  Made with a jersey knit fabric, and a fun chevron print in the skirt.  I couldn't resist it.  After I made one for my daughter, I made one for my niece to match.  And I have had plenty more requests for this fun dress.
Patterns will come in sizes 2-12 for girls.
Well, I have the pattern ready to share with you!!  I am looking for 2 people to test this pattern for me.  If you would like to test this please follow the giveaway instructions below.  Here's the deal for you. You get the pattern for free. I only ask that you are able to sew the dress within a week of me emailing it to you, and give me any comments or suggestions you may have.  If you have any reason that you think you may not be able to get it sewn in time, please do not enter the raffle.  As soon as you have tested the sewing pattern as a thank you to you for your help, I will send you another free sewing pattern of your choice from my shop.  Here is a link to my shop to check it out - www.etsy.com/shop/mytaylormade.  
Contest will last 1 week starting tonight at midnight and ending at midnight, on Tuesday, June 18th.

a Rafflecopter giveaway

Wednesday, May 29, 2013

Get Ready for Summer Fashion

I am getting so excited for summer this year!  Ever since we moved back to Idaho, I have had a tough time through the winters.  I've decided I hate the cold!!  So as soon as school is out, and the weather is nice all I want to do is be outside.  We have spent so much time outside in our yard this year.  We moved into this home last fall right before our baby was born.  So the yard didn't get much attention from any of us until now.  Mike and the kids planted the garden.  We have been cutting and trimming trees and bushes all spring.  I think it is going to get as good as it can.  We are definitely not gardening people, but we are learning.
Here are a few patterns that will be prefect for the summer!

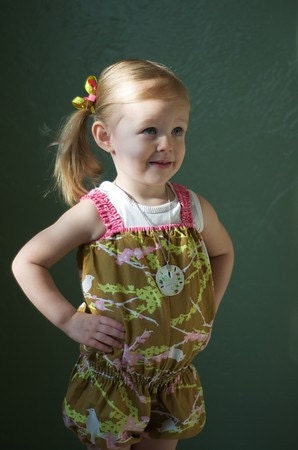
The Girly Girl Romper is perfect to put over a swimsuit or to wear as an outfit by itself.  I love this outfit for the park, it is perfect.  Elastic straps for easy on and off, for those independent girls that want to get themselves dresses. Elastic at the top, and at each leg to add some fluff. And elastic thread at waistline to show off the cute little body.

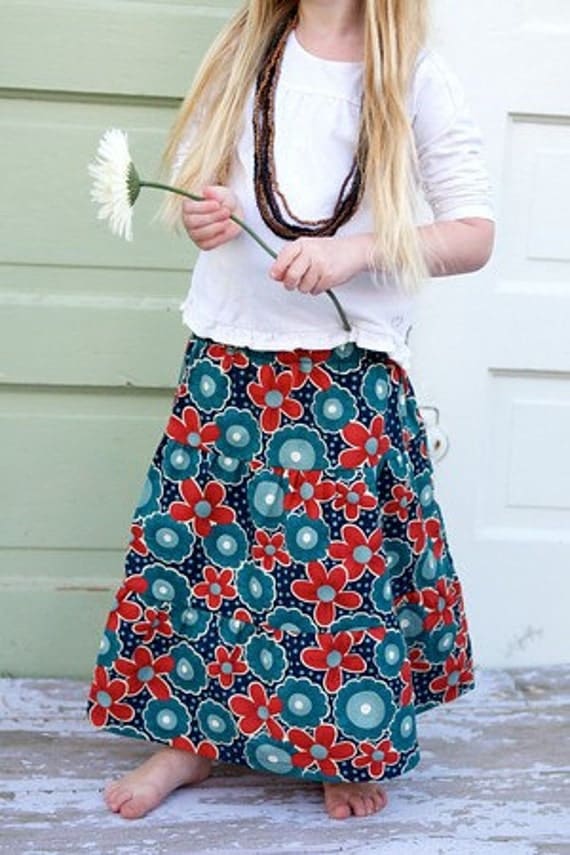
I am not sure what it is about summer, but I love to wear skirts.  I guess I just get bored of shorts and want to look cute.  My daughter is the same way.  She wears a skirt 80% of the time.  This Girls and Women's 3 Layer Skirt is perfect for the hot summer days.  Plenty of room for the little girls to still run and play, but feel pretty at the same time.  Mommy can use the same pattern to match!

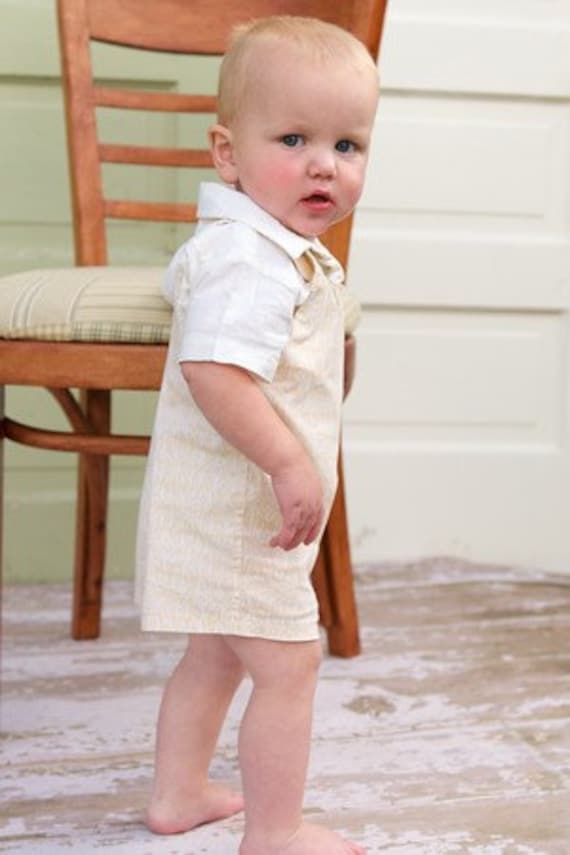
Babies and boys need to be just as cute and comfortable through the summer.  With these Romper choices they are sure to be the cutest baby on the block!
Jack and Jill Bubble Romper PDF Sewing Pattern

Thursday, May 16, 2013

Healthy Eats, Chicken Salad

Having 4 babies has had it's tole on my body!  Since our last baby was born last fall, I have been working hard to get my body back to what I want.  Some days it is not fun.  Some days I just want to eat every piece of junk food that I can see.  But overall, I have pleasantly been very proud of myself.  I had pinned this great recipe a while back, and thought I would make it for dinner a couple nights ago.  It was fantastic!  I loved it!  My kids actually asked if I would make it again sometime.  I didn't tell them that they just ate an avocado, so I think that helped, and I added some grapes to the salad which are a huge fan favorite in our house.  Thanks to Becoming Betty, I now have a new favorite in my house.  If you follow this link it will take you to the Becoming Betty blog so you can get the recipe.  Try adding some grapes and almond slices to it when you make it, you will love it!  The kids and I put the salad in wraps.
Picture is from Becoming Betty's blog.  Mine wasn't as pretty as her's!

Monday, April 29, 2013

Sewing Machine Comparisons

 I have been asked so many times for advise for buying a sewing machine.  So I thought I would share with you my thoughts and hope that it may help some of you.
When I was 10 or 12, my grandma was so sweet and wanted to buy me my own sewing machine that she found at a sewing machine sale at a hotel in town.  They raved about how great the sewing machine was and all the wonderful things that it could do.  I am sad to say, but it actually really sucked!  I ended up going crazy and got rid of it.  That started my search for good machines.
I have a couple sewing machines right now.  One is a Singer that I found on Ebay when I was newly married and didn't have much money.  I found out after I had it for a couple months that the button hole feature stopped working.  I love this machine though when I teach sewing lessons.  It is a great machine for basic needs, and not complicated with lots of buttons or dials.  My other machine that I just got, is a Bernina.  I really love this brand of machines.
I see so many sewing machines out there that are under $100 brand new.  I really don't recommend these machines.  Every time I have helped anyone who has bought one of these, we end up fighting the sewing machine more than sewing.  They are truly basic, and when you don't know what you need to do to fix a problem, your machine can cause a ton of trouble for you.  You are getting what you pay for.
There is a local shop here in my town that carries good sewing machines.  I would suggest checking local in your area first.  This shop that is close to me sells used sewing machines at great prices.  A couple years ago, I almost bought a used Bernina Sewing Machine for $170.  Which is a fabulous cost.  It was only a few years old, used by a school that needed to update.  I also used to have a Husqvarna sewing machine.  It was wonderful!  My sister now has it, and it is at least 20 years old.  It sews just as smooth today as it did when we first got it.  The only problem with going with brands like these, is the cost.  Again, you get what you pay for.  These machines usually come with quite a few extras, and the motors are very strong.
When I tell people about the expensive machines, they get a little nervous about the cost. So, I thought I would do some research and show you which sewing machines I would buy if I were a beginner sewer!  I found 2 affordable sewing machines on Amazon that would be good for a beginner.
 

Brother Project Runway Electric Sewing Machine

Features of this machine are - 
  • 50 built-in utility, decorative and heirloom stitches, each with multiple stitch functions.
  • Sew fleece, elastic and other stretchy fabrics with the built-in stretch stitches.
  • One-step bobbin replacement with quick set drop-in bobbin.
  • Embellish or join quilt blocks with the built-in quilting stitches.
PRICE: $123.11on Amazon

SINGER 5500 Fashion Mate Sewing Machine

Features of this machine are - 
  • automatic needle threader for easy threading
  • Stitch width and length are set at the optimum setting but are fully adjustable for special projects
  • 100 built-in stitches including 6 fully automatic 1-step buttonholes, 1 endless buttonhole for custom sizing and over 70 decorative stitches
  • Automatic tension feature keeps stitches balanced regardless of fabric type
  • Free accessories include select presser feet, bobbins and needles, Includes extension table and hard-sided cover
 
If I were to choose between these two machines, I would choose the Singer sewing Machine.  It offers more, and personally think it is a better brand than Brother.
 
Features that I love and can't live without in my sewing machine are - 
  • the more stitch choices the better!!
  • a working 1 step button hole
  • needle up down option (great for pivoting around corners)
  • Front loading bobbin (It's what I learned on, and I feel off when I use a top loading bobbin)
  • Long stitch length
  • bobbin thread sensor (I don't think this is found on the cheaper machines, I'm not sure thought)
  • Offers a lot of light
I hope this helps.  I am sure I may think of more thoughts later.  And I hope these are not just jumbled for you.  Unfortunately most thoughts out of my head are very jumbled!!  If you have any thought of sewing machines, please leave your comments!  I'd love to know what your favorite sewing machine is?


Tuesday, April 16, 2013

Photo Shoot

You have heard me talk about them before.  But I am just amazed with my good friends Emily and Nate with Emily and Nate Photographers.  A couple weeks ago we got together for a photo shoot with some of my patterns that I wanted to have new pictures, and with some new patterns.  I am so absolutely thrilled about how the pictures turned out!  Emily always takes such wonderful care of me.  Here is a look at the shoot.
 Amy Purse

 Jack and Jill Romper

 The NEW Katelyn Dress

Tie

 Hailey Wrap

Melanie Hobo Bag

Peasant Dress, with long sleeve option

Ruffle Back Skirt

2 Layer Skirt

Girly Girl Romper

Here are the NEW patterns coming soon!!
 Coming Soon!!  Addy Pant

Coming Soon!!  Flower Purse

Coming Soon!!  Tyler Overall

Coming Soon!!  Sweater Vest

Coming Soon!!  Chevron Dress

How awesome are those?!  I am so excited to get them all into the shop.  And major props to all my cute models!  It always helps when your model is perfect.  
I would love to get your opinion.  In the past I usually do a pattern contest to have someone test my pattern for me.  Do you like that?  I have had a few people who have taken advantage of getting that pattern for free, and then I don't ever hear from them again.  But I have loved the feedback that I have gotten from those who have given it.  The feedback helps me to improve the pattern.  So what are your thoughts?  Pattern contest or not?

Tuesday, February 12, 2013

Candlelight Fondue Night

It feels good to be back and blogging again.  We now have a beautiful baby boy that I have truly enjoyed taking the time away to spend with him.  My older kids have been so fun to watch as they enjoy him as well.  I will catch you up on the time I took off in a later post.  But for now I want to share with you the fun night we had last night.

We have a tradition in our  home every Valentines Day.  My sister-in-law started it with her boys and I fell in love with the idea.  When our kids grew to an age that they would love it, we started to make them a romantic dinner by candle light.  They LOVE it!

I always try to make something that is nicer than what we would usually eat.  This year I chose a recipe that we have done it the past, and the kids were very pleased.  We started out with a nice Shrimp Pasta and a Strawberry Spinach Salad with rolls.  Then the highlight of the night for our kids is Fondue!  They talk all year about the romantic candlelight fondue.

Here are recipe's we used, I completely loved them!! The salad is so fantastic!! You really have to try it. The pasta was really good also, but I did think it was missing something the last time I made it. But I and no chef to be able to make any major changes. So this year I also added some chicken.  Thanks to kraftfoods.com and allrecipes.com we had a wonderful night.


Shrimp-in-Love Pasta
prep: 10 min Total time: 25 min serves 2

4 oz. linguine, uncooked
1 c. cleaned medium fresh shrimp
2 medium tomatoes, chopped (about 1 c.)
1/2 c. cream cheese spread
1 1/2 c. torn spinach, cleaned

Cook linguine as directed on package
Meanwhile, heat large skillet on medium-high heat. Add shrimp, tomatoes and cream cheese; cook and stir 3-4 minutes or until shrimp are cooked through and mixture is well blended.
Drain pasta; place in large bowl. Add spinach; toss lightly. Stir in shrimp mixture.
(When I added the chicken I threw bite size pieces in the skillet and sprinkled a Tony Chacheries Creole Seasoning before I added the rest of the ingredients.)  I think the Creole Seasoning was the added flavor I missed in the pasta the last time I made it.


Strawberry Spinach Salad
prep: 10 min ready in: 1 hr 10 min serves 4

2 Tbsp. sesame seeds
1 Tbsp. poppy seeds
1/2 c. white sugar
1/2 c. olive oil
1/4 c. distilled white vinegar
1/4 tsp. paprika
1/4 tsp. Worcestershire sauce
1 Tbsp. minced onion
10 ounces fresh spinach - rinsed, dried and torn into bite-size pieces
1 qt. strawberries - cleaned, hulled and sliced
1/4 c. almonds, blanched and slivered (I just use the Almond Accents, or toast almonds in the oven)
In medium bowl, whisk together the sesame seeds, poppy seeds, sugar, olive oil, vinegar, paprika, Worcestershire sauce and onion. Cover, and chill for 1 hour.
In large bowl, combine spinach, strawberries and almonds. Pour dressing over salad, and toss. Refrigerate 10-15 minutes before serving. (I had to leave the dressing on the side, for the kids sake, but my daughter added it to her salad and loved it.)
 
 
And the Fabulous Fondue!!
 
 Chocolate Fondue Duet
(I don't remember where I got this recipe, I have been using it for many years)

3 squares semi-sweet baking chocolate
2 Tbsp. corn syrup
1/4 c. whipping cream, divided
3 squares white baking chocolate
1/4 tsp. vanilla
 
Mix semi-sweet chocolate, corn syrup and 2 Tbsp. of the cream in microwaveable bowl. Microwave on medium 1 to 1 1/2 min. or until chocolate is completely melted when stirred. Add white chocolate and remaining 2 Tbsp. cream in another microwaveable bowl. Microwave 1 to 1 1/2 min. or until chocolate is completely melted when stirred. Place small serving bowl on serving plate. Pour both chocolate mixtures into bowl at same time, side by side. Serve as a warm dip with assorted cut-up fresh fruit, cookies, marshmallows, pound cake cubes and or pretzels.

Tuesday, May 22, 2012

MOVING!

Isn't there always a lot going on for all of us.  The end of the school year always bring graduations and school programs.  Sports are starting and some are ending.  It is such a busy time of year.  I always look forward to the summer though.  I feel like I get more time to just enjoy my kids, instead of running around every where.
This year is a little different for us.  We will be moving to a new city in a couple days, and at the end of the summer we will be having a baby!  We are very excited for the change, and ready for the new challenge.
Because of so much going on with my family right now, I have decided that I will not sew any custom orders until after Christmas 2012.  Maybe by then I will find some normalcy to my life! hehe  I will continue to sell my patterns and I will still work on the patterns that are ready to go out.  But I will not be designing anything new until January 2013.
I will continue to keep in touch and post on the blog, so please stay posted.  I am truly thankful for all of my followers.

Wednesday, February 22, 2012

New Purse Pattern Tester

I have been needing a new purse for a while now.  My purse was looking so sad.  The handles were about to tear right in half, and the bottom was getting well worn.  So I had 2 choices, I could either go buy a purse quick and have life be simple, or I could design a new purse and sew it.  Well, I chose the harder path.  I couldn't resist the chance for a new purse.  And I have to tell you, I have been using this purse for at least a week now, and I keep getting so many compliments on it.  Everyone is so amazed that it is handmade!  So I am now looking for pattern testers!


I am needing 2 people to test this pattern for me.  If you would like to test this please leave me a comment below. If you would like an extra point in the drawing, please leave a comment on facebook or twitter and leave me the link to see it (I would appreciate your help in telling people about my shop).  Please leave me a way to contact you if you win!!!
Here's the deal. You get the pattern for free. I only ask that you are able to sew the bag within a week of me emailing it to you, and give me any comments or suggestions you may have.
Contest will last 2 weeks this time and end at midnight, on Wednesday, March 7th.