Monday, September 2, 2013

Halloween Is Around The Corner

Sometimes I think Halloween always sneaks up on me.  My kids and I always start talking about their costumes in June, but I never get them started until the end of September or just a week before Halloween.  We have had some fun Halloween costumes at our house though.  I am pretty excited with how costumes turned out last year so I thought I would share them with you.

I don't know what I was thinking because my son wanted to be Optimus Prime.  I had no idea what I was going to do to make his costume, so I set off on the internet!  I love the internet.  I found a few different tutorials for the costume that adults had made for themselves.  I was really impressed with how well they were made.  So I had the bright idea to do a similar costume for a child and take bits and pieces from each costume that I liked.  It took FOREVER to get it done!  I think I spent about 20 hours on the costume.  I would get the kids to bed, turn on a movie, and start taping and gluing boxes together.  I used diaper, wipes, cereal, cracker, and yogurt boxes.  I added some PVC pipe for the Pipes on each shoulder and painted them.  The decals on the costume are printouts from the computer.  The vent thing on his belly was made by folding card stock.  The hat was a dress up fireman hat that I added some box pieces, toilet paper rolls, flat pencils, and more card stock.  We had him wear white longjons underneath, and some sunglasses.  I think I might be the most proud of this costume.  He was excited, and still talks about it.  So we will save it and share with his brothers for future Halloweens.

Another box creation!  It worked out well for us last year with all these box ideas the kids had because we had just moved.  So we had plenty of boxes to use!  This costume was so much easier to make.  We cut and folded moving boxes to make the basic shape of this truck.  Added toilet paper rolls for the lights in the front and the back.  Added fabric straps for over the shoulders, and paper plates for the tires.  Vroom he went!

After having a new baby, I didn't want to dress this little guy in something that was uncomfortable.  I knew I would be carrying him in a front carrier on me when we went trick or treating.  So I thought he needed something that we could stick on the outside of the carrier so he could still have a costume.  This was as super quick costume  to make.  With some scrap fabrics, I cut the large brown with a green that is on the underside to the shape of a turtle shell.  Then I cut all the little pieces in the green and a burnt orange and layered them on top of each other.  I wanted that little bit of orange to stick out.  Sewed all the edges and cut them like I would have if I were making a rag quilt.  Then added eyes to a beanie.  Kept him warm and cuddly, just how I like my babies!

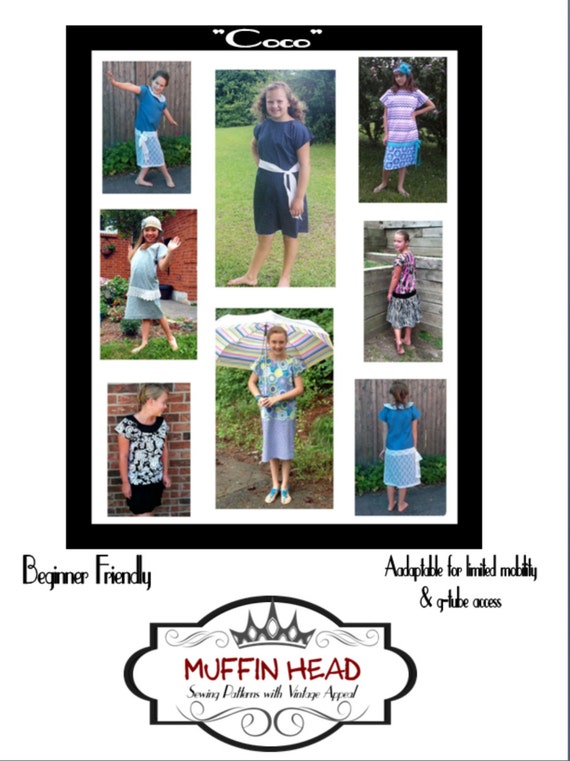
Can't have a Halloween without a flapper!  This was so fun to sew.  I just made up my pattern as I went.  The fabric came with the sparkles all over it, and then I added the fringe to the bottom.  Bought some black ribbon for the headband, then added feathers.  Threw on some make up with the bright lipstick, and a necklace and of course she wore heels that you can't see in this picture.  I don't have a pattern for this dress, but a good friend of mine just came out with a pattern that is very similar, and so adorable.  Check it out by clicking on the image below if you would like to make this -I got to be one of the testers for this pattern, and it was so fun and easy to sew, and Frances is wonderful to work with.  I am in love with how the black and white one turned out in the picture below.
Well this year I have been asked to make a zombie costume, witch costume, and Bigfoot.  So I am thinking about having the baby be a monster hunter since the other kids are all some sort of monster.  I am not positive how to make it all work, so any suggestions would be fabulous!  I bought the fabric I needed for some of the costumes, and so hopefully I can get started sooner this year.

Friday, August 23, 2013

Meet the Testers for the Addy Pant with Free Legging Pattern

I love getting to know new people through my patterns.  It is so much fun!  I think I have been very lucky with all my patterns to find wonderful pattern testers.  The girls who have tested my Addy Pant pattern were wonderful!  I ended up adding the legging pattern to the Addy pant, which turned out perfectly!  Here are some pictures of what these awesome ladies have done with the pattern.
 It was so fun to have Jerica test these leggings for me.  This was one of her first time sewing with knits, and I think they turned out awesome!  How cute are leggings on these tiny little legs.  Jerica has opened a shop on facebook that you need to stop by and follow.  https://www.facebook.com/BugberryBoutique  She is just getting her page started and is working on adding everything to it, so please share to help get Bugberry Boutique known.
Amy is so on top of it!  She made this pair out of a jersey sheet using the top of the sheet for the hem of each pant leg.  I love the large folded hem.  It looks adorable!  Amy has the idea of adding some fun embellishments and pockets to a pair of pants too.  I can't wait to see how those turn out.

 Cheri was so wonderful that she made 3 pairs from the pattern using fleece cotton and knit.  Cheri is the perfect grandma!  I think that is what I love so much about this basic pattern is that is is so versatile for any fabric.  And how great do they look on Cheri's granddaughter.  Cheri also has a shop, check her out on etsy here - https://www.etsy.com/shop/TheFiberChick and like her on facebook here -
https://www.facebook.com/TheFiberChick
.


I am hoping to get another review soon, and to have any changes made to the pattern by today.  So please keep your eye out in my shop.  I will offer the Addy Pant Pattern with the free legging for 1/2 off for 1 week after it is listed.

Tuesday, August 6, 2013

Addy Pant

Newest Pattern!!  The Addy Pant comes in sizes 2 - 12.  Perfect pattern just in time for school.
 I have actually had this pattern for a while, and I have been hording it!  I have been making these for my daughter and a few other people who have seen them and wanted some.  So I decided I better share!  It is such a wonderful pattern for the beginner sewer.  Basic pant with an elastic waist and flared leg.  It is such a versitile pattern as far as fabrics that can be used.  I have made these with a soft cotton, a suiting fabric, and even knit.

I am tempted, and would love your suggestions, but I am thinking of adding a basic legging pattern as a bonus to this pattern.  Let me know what you think!?  Wouldn't that be great!!
I am in need of pattern testers!!  I am looking for 2 people to test this pattern for me.  If you like the idea of adding the legging pattern as a bonus, I will draw for 2 additional testers.  So please specify which you would prefer to sew.  If you would like to test this please follow the giveaway instructions below.  Here's the deal for you. You get the pattern for free. I only ask that you are able to sew the dress within a week of me emailing it to you, and give me any comments or suggestions you may have.  I will attach a comment form for you.  If you have any reason that you think you may not be able to get it sewn in time, please do not enter the raffle.  As soon as you have tested the sewing pattern as a thank you to you for your help, I will send you another free sewing pattern of your choice from my shop.  Here is a link to my shop to check it out - https://www.etsy.com/shop/mytaylormade
Contest will last 1 week starting tonight at midnight and ending at midnight, on Tuesday, August 13th.

a Rafflecopter giveaway

Saturday, July 27, 2013

Breast Cancer Port Pillows, Tutorial

It is so hard to see anyone go through any type of pain.  It is even harder to see someone you love suffer trough pain.  My cousin,who I have always been close to, recently found out that she had breast cancer.  They planned a day for surgery, but found out the cancer was growing way to fast to have the surgery.  So she had to start chemo.  She is pretty excited to be halfway through the harshest part of the Chemo.  A few days ago, she sent me a pin on Pinterest where she found the most amazing blog.
MyFabricFriend.com has come up with an amazing idea for people who are battling breast cancer.  I have to give her all the credit for this, I wouldn't have even thought about it!  I would love if you could stop by her blog and read her story about her port pillows and how she has helped so many with these small pillows.
The idea of the pillows is to be able to strap the pillow to the seat belt with velcro and then lay over top of an incision or the pain.  My cousin has an incision right where the seat belt lays over her.  So she has been driving with the seat belt under her arm.  Her husband hasn't been to pleased with her not being safe, so she found this awesome blog.
Well, I thought I would give you some pictures and show you how I learned to make these from MyFabricFriend.com.

 I started with a 5 1/2" square and 4" of velcro.

 Made sure the velcro could be sewn into both sides and it overlapped in the center of the square.  Pin down if you need to.

 Sew around the square at 1/4" leaving a small opening about 1 1/2".  The velcro is sandwiched in between both fabrics.

 Cut the corners off making sure not to cut through the stitch line.

 Turn right side out through the opening.

Stuff the pillow with fiberfill stuffing, and sew the opening closed.

This is how mine turned out!  I loved it!  A quick project that I finished in no time, and used scraps of fabric.  But it will give my cousin so much comfort.  This is the perfect gift idea for that someone you know going through this battle in their life.

Monday, July 22, 2013

Mountains of Idaho, and coupon code


I hope you all are having a fun summer!  I have been loving the time with my family.  We love to be in the outdoors and exploring or taking advantage of this beautiful earth!  We live in Idaho, and are so luck to have all of the mountains so close to us.  It makes it easy to take a quick trip or to stay and enjoy the day.  My husband has been fishing all his life, and he is so amazing at it.  Before we had kids, we went all the time.  Once we started having kids, we didn't want to take the little ones in the boat.  So Mike went without me.  A couple weeks ago we asked our mom's to watch the kids, and just the two of us floated down the river.  It was gorgeous!  I missed it so much, and just took it all in.  These pictures are not as great as some of you could have taken, but I just used my phone to take them.  But I think they are still gorgeous!


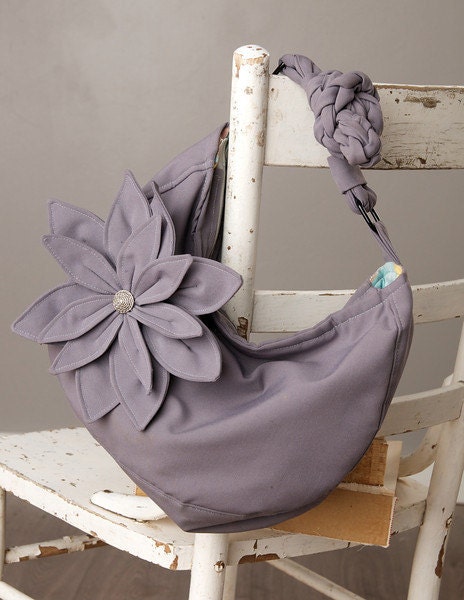
I also wanted to make sure you knew that I finally have the Daisy Purse in my shop for sale!  I wanted to make sure everyone knew that through Friday July 26th the pattern will be 1/2 off.  Make sure to use coupon code - PURSE12


Tuesday, July 2, 2013

Pants Redo FREE Tutorial

I really wish I was more on top of it, but I literally had a last minute thought before the 4th of July to make my daughter something fun and patriotic to wear.  So as usual I saved it for last minute and have had to rush to get it done.  I called my sister-in-law up and asked her if she wanted to come over and sew some fun skirts for all of our girls for the 4th of July!  So we ventured out, and got going on it.
I am sure I am not the only one that has kids who ruin all their jeans!  I am all about re-use and re-purpose!!  So I wanted to make a jean skirt.  I get bored of all the skirts that people cut straight across and just add the ruffle.  So I decided that mine needed some extra flare.  I cut the jeans at a fun angle, and I LOVE it!  So fun!!  I also had the cute vintage fabric left over from my mom's house.  I stole it, and I'm proud!
Here are the instruction on how I put my skirt together.  I may be missing a step here or there due to lack of planning.  I was trying to hurry and get all three skirts done, and so I may be missing a picture.  I actually only have one skirt finished I have 2 more to get working on today.  These girls have to have their ruffles!!!  If I have missed any steps, please send me an email, and I can help you get through your skirt.
Here are our basic jeans.  I have made my daughter another skirt like this, and I think I even used her brothers old jeans for those.  So the jeans don't really matter where they come from, just an old pair with holes or that may be to small.
 

Cut the legs off like this.  I hope you can notice that one leg is cut longer and a slight curve is cut right at the crotch of the pants.

This is where I am missing some steps for you.  I don't have specific amounts for you to cut.  But I will tell you what I did for all three of your skirts and it worked wonderful.  I cut 24 strips total of each for all three girls (Used 3 on 1 skirt, 4 on another, and 5 on the last).  Cut your strips at 3" x width of the fabric for the ruffles.  Cut 2" x 20" for the under ruffle.

Sew edges together to make 12 large circles of ruffles and of under ruffle.

 This is where I am missing another couple pictures for a step.  Make sure to do a rolled hem at the bottom of the ruffles or surge them like I have.  The rolled hem looks way nicer, but I was in a hurry and surged all of the edges of mine.
To the top of each ruffle you will need to gather it.  Whether you choose to use a basting stitch, or gather it on your machine that doesn't matter.
Now to match the picture above!  I have pined the gathered edge of the ruffle to one edge of the under ruffle.  Then Sew.

 The top stitch isn't crucial to the skirt, but I always add a top stitch when I can.  I think it makes things look more crisp and professional.

 Adding the next layer.  To the top edge of the under ruffle, place the next ruffle on top with the next under ruffle on top of that and sew.  The right side of the bottom under ruffle is facing the wrong side of the second ruffle, and the right side of the second ruffle is facing the right side of the second under ruffle.

 Top stitch.  And then continue to add all the layers you will need for the length of your skirt.

I thought I had to add something more to the jeans so I cut out some starts, and then appliqued them to the jeans.  When sewing an applique, it is best to use some kind of a stabilizer.  There are so many stabilizers out there, but on the package it will tell you which one is for which fabric.

I didn't show it very good at all in this picture, but I added a gather stitch to the top under ruffle.  The top under ruffle is tucked underneath the jeans here and pinned down.

 Sew together.  I used a stitch that looks like this on my sewing machine.  I can't remember the name of the stitch.  But it is awesome!  It makes that thick stitch look that you see on all the jeans.  It doesn't sew 3 separate lines like you would think.  It sews 3 times directly on top of each stitch to make regular thread look nice and thick.  Way cute!!  I love this stitch.
AND YOU ARE DONE!!
Thanks for putting up with my poor instructions.  I hope your skirts turn out wonderfully!!  I would love to see pictures after you are done.  If you will share, send them to my email or to my flicker account -  http://www.flickr.com/groups/1449172@N23/


Here is a picture of the 1st skirt I made.  I used a sparkled ruffle trim and an eyelet trim for it.  She wore this skirt until it was to tight and short!
 
HAPPY 4TH OF JULY!  I am thankful for the freedom that I have from my country.

Thursday, June 27, 2013

Chevron Maxi Dress 1/2 OFF Coupon Code

It is out!!  The Chevron Maxi Dress Pattern is out!!  The testers all did such an awesome job!  And I loved working with them.
Thanks again Jamie and Marisa.  Here are pictures of how their dresses turned out.

I am offering a coupon code for this pattern until July 3rd.  Go my Etsy Shop and after adding the pattern to your shopping cart enter coupon code CHEVRON12 to get 1/2 off the pattern price.

Thursday, June 20, 2013

Sewing With Knit Fabrics, How To


Sewing knits can be very frustrating for a beginner seamstress.  Some people are so scared to sew on a knit fabric.  One of the scariest things with a knit fabric is how far they can stretch while sewing.  And sometimes they will stretch in all 4 directions!


Before you want to start your project on knit fabric, make sure you remember is to pre wash your fabric!!  Most knits will shrink, and it would be so sad to have it shrink after you have made your maxi skirt or what ever it is you are sewing.

Then check the needle on your sewing machine.  The needle should only be used for 8-10 hours of sewing.  After that it will not give you the quality that you deserve.  Needle also come in different sizes, so make sure to use a ball point needle.  To get specific, the reason why is a ball point needle slides off the fabric threads instead of piercing through them  If you use a sharper needle you may have snags or a run in your fabric.


The best stitch to use on your knits is a serged edge.  The reason why is because a seger gives a slight stretch in the way it sews.  Don't worry if you don't own a serger, most people don't.  Here are 2 suggestions for stitch choices on your sewing machine.  By using either of these stitches you will keep thread from breaking while stretching when worn.
Every sewing machine comes with a zig zag stitch wich will work great.
Some sewing machines offer a stitch for sewing on knits, that are even more wonderful.

            Zig Zag stitch looks like this 

            Knit stitch looks like this 

There is not much of a difference between the two.  The difference is that the knit stitch takes a stitch backwards to help for the stretching fabric.  Both will work just great.

Keep in mind when sewing with the zig zag stitch, stretch the fabric slightly while sewing.  Just a little pull towards you as you are feeding the fabric through your sewing machine.  If you pull to much, the fabric may start to gather and look awkward.  So remember to just pull slightly.  Below is a picture of me pulling on my machine with a zig zag stitch.


I actually love sewing on knits, and I love even more to wear them.  Once you find the confidence to sew on knit fabrics, you will love them.  There are so many different knits out there and right now I am loving how many cute ones I can find!!  I will post a few simple projects for you to give a try soon.  An infinity scarf if a perfect start and very simple to do, and also a maxi skirt.  If you are ever sewing with a knit and are frustrated send me an email.  Lets figure it out together!!

Wednesday, June 19, 2013

Chevron Dress Winner's

And the winner's are - 
Jamie Little
and
Marisa Corrigan
I am so excited!  That was the best turn out that I have ever had for a pattern tester!  I am so giddy! Both ladies have the pattern and will have it tested within a week.  Then the pattern will be out for sale!  I will post later today a few helps with sewing with knits.

Tuesday, June 11, 2013

Chevron Maxi Dress Pattern Tester and Free Pattern ~ Closed

Last summer I had my really good friend help me make a pattern for the cutest quilt ever.  I am so addicted to chevrons, they are so fun!!  As soon as I figure out all of our chicken scratched notes I will share with you the instructions on how we made this quilt.
We made my baby a quilt before he was born, and once that was done I wanted to sew something else with a chevron in it.  Another love of mine are basic maxi skirts.  They are so comfortable and versatile for most occasions.  So with these two things as inspiration, I set out to make this fun new sewing pattern for girls.  It is such a fun dress with a short cap sleeve and scoop neckline.  Made with a jersey knit fabric, and a fun chevron print in the skirt.  I couldn't resist it.  After I made one for my daughter, I made one for my niece to match.  And I have had plenty more requests for this fun dress.
Patterns will come in sizes 2-12 for girls.
Well, I have the pattern ready to share with you!!  I am looking for 2 people to test this pattern for me.  If you would like to test this please follow the giveaway instructions below.  Here's the deal for you. You get the pattern for free. I only ask that you are able to sew the dress within a week of me emailing it to you, and give me any comments or suggestions you may have.  If you have any reason that you think you may not be able to get it sewn in time, please do not enter the raffle.  As soon as you have tested the sewing pattern as a thank you to you for your help, I will send you another free sewing pattern of your choice from my shop.  Here is a link to my shop to check it out - www.etsy.com/shop/mytaylormade.  
Contest will last 1 week starting tonight at midnight and ending at midnight, on Tuesday, June 18th.

a Rafflecopter giveaway