Saturday, November 8, 2014

T-Shirt Re-Do

Do you get t-shirts that are over sized, or just don't give you the fit that you want?  Do you wear them, or do you just stuff them in the back of the closet.  I always tend to stuff mine in the back of my closet for frumpy days.  Because we all have frumpy day's right!?  But sometimes there are those t-shirts that I just love, and I want to wear them not feeling frumpy.

I have had this shirt for 6 months now, and never worn it!  I love this shirt, I worked hard for it, and I thought I should show it off.  But every time I put it on, it didn't stay on, I changed into something that looked better.  If you want to find out what I did to win this shirt, send me a message, you can win it too!

So I made a quick tutorial on how to re-fashion your over sized t-shirts to a regular size.  This is a quick easy job.  No serger needed.  The fabric is knit, and it won't fray.  So anyone can do this!  It took me an hour to get mine done.  I am putting this together quickly, so if you have any questions send me an email or leave a comment below.  Some of the pictures are flipped sideways, and messy looking.  Sorry for that.  I was excited to wear my shirt!


TAKING THE SHIRT APART
 1. Because my shirt wasn't to over sized, I needed to take out the hem, so I had plenty of fabric to work with.  If you can see in the second picture, I have placed one of my favorite shirts over the top to use as a guide.  See step 2 to decide of this is necessary for you to do with your shirt.


2. Cut 2" off the bottom of the shirt.  Make sure the hem is not in this.  That is why I picked my hem out. my shirt was not long enough.  This strip will be used later for the neckline.

3. Cut the sleeve out of the arm hole.  Make sure to take the whole seam out.

4.  I have my favorite sleeve laying over the top of the shirt for a guide again.  To keep the original hem, lay the guide shirt over top with the hem's matching up, and the top of the sleeve matching up.

5. This is where it may look confusing.  You are more than welcome to email me with any questions.  I needed to use the seamline of the guide shirt on my sleeve.  So I folded the shirt out of the way, and cut the excess sleeve off that I didn't need.  If you look at the second picture here, it helps pull the idea together.  Keep in mind using the guide shirt, you will need to remember to add enough for your seam allowance, or your shirt may become too tight!


6.  Again I put the guide shirt over top of the shirt.  Notice that I have folded both shirts in half so the side seams are together.  I wanted to make sure they were the same on both sides, so I would recommend doing this for you.  Then cut.


7.  Now the shoulders.  I trimmed off about 3/4" on the top and curved it down to the arm pit.

8.  Still working on the shoulders.  The front of your body and the back of your body are not the same, so I wanted to make a little less ease for the front of the arm hole.  So only to the front of the shirt, I cut a little more of an angle.

9. Neckline.  Fold the shirt in half, having the center front and center back of the shirt be the fold line.  Cut the neckline off of your shirt, unless you want to keep it the same.  I wanted a v neck shirt, so I cut a slight v at the front of the shirt.

PUTTING THE SHIRT BACK TOGETHER!
10. Sew the sleeves into the arm holes with right sides together.

11.  Sew the side seams with right sides together.

12. Neckline.  Measure the neckline of the shirt.  Cut the trim piece you cut off on the beginning to the same length.


13. With right sides together, sew the short ends together.

14. Fold the trim in half with wrong sides together.

15.  With the right sides of the trim and the right side of the shirt, sew together.

16.  If you chose to sew a v neck also.  Sew at an angle on the trim piece down into the seam of the v.

17. Hem the shirt.  I chose to use a double needle.  When sewing with knit, you will need a double needle if you do not want your thread to bread every time you put your shirt on.  If you do not have a double needle go to this link for help with sewing knit fabrics - http://mytaylormade.blogspot.com/2013/06/sewing-with-knit-fabrics-how-to.html

18. Stitch around the neckline to give the professional look.  Again, I used the double needle.

WEAR AND ENJOY!  YOU DID FABULOUS!  Now you can show off your figure instead of feeling frumpy!  Go YOU!  I want to know how your shirt turned out, email me a picture, or post it below.
 If you want to find out how to win this shirt too, leave me a comment or send me an email!


Photobucket

Friday, October 24, 2014

Clean Eating Zucchini Bread

After trying to have a healthier life style for my family and myself, I have been a little nervous to go into this time of year.  Seriously, food is the best in the fall.  All the pumpkin and apple pies, loaves of yummy bread, caramel apples, all of that yummy stuff.  What is a girl to do when she had a fabulous bowl of soup and bread sticks are staring her right in the face!  Right!?

So this is what I did, to help myself out a little.  After trying a few recipes for zucchini bread that were a little healthier.  I couldn't get some of them to rise, or they didn't have any flavor.  So I kept trying and kept playing around with a few ingredients.  One of the recipes that I tried had used oats in it, and it was so moist.  But the flavor wasn't exactly what I wanted.  So I knew I wanted oats, but I knew I didn't want enriched flour.  So I had posted on facebook to some friends, asking for suggestions on flours.  I had quite the response to Almond flour.  I felt pretty good about buying it, since I knew the people who had suggested it to me were all fabulous cooks.

To compare the two flours from what I have learned.
 - Enriched flour, usually means that during the processing all the good for you nutrients were stripped out away.  Then to top it off, the "enriched" means that the flour has had more processed products, or preservatives put back into it.  Because it is so starchy we lose our energy more quickly since it is not being broken up slowly in our bodies.
- Almond flour, is made from raw almonds ground down to a fine texture.  A good source of protein, fat, and nutrients.  So we feel more full between meals, and keep our energy up.


Here is the recipe I came up with, and my family truly enjoys!

Clean Eating Zucchini Bread
1 cup Almond Flour
1 cup oats (ground)
1/4 teaspoon sea salt
1/2 teaspoon baking soda
1 teaspoon ground cinnamon
1/4 teaspoon ground nutmeg
1/4 teaspoons ground ginger
Dash ground cloves
1/4 cup olive oil or coconut oil
1/2 cup raw honey
2 large eggs
1 1/2 cups puree zucchini
Preheat oven to 350
Grease and flour bread pan.
Combine all ingredients in mixer.
Pour the batter into your baking pan, and bake for about 60 min or until a toothpick inserted in the center of the bread comes out clean.
Cool, slice and enjoy!
Photobucket

Tuesday, October 14, 2014

My Favorite 21 Day fix Snacks To Go

Why do we think healthy snacks are more work than unhealthy snacks.  We always grab a bag of potato chips, or a candy bar at the gas station thinking that is all we have time for.  Our days are busy, we all have the weight of the world on our shoulders.  If it is running kids around, working 2 jobs, taking care of animals, or just just being one of those sweet spirits that just can't say no and does it all!  So I wanted to put together some of my favorite snacks that I take as I am running around.  
I am color coding these snacks for those of you that love the 21 day fix program.  If you don't know what the 21 day fix program is, send me a message.  I would love to fill you in!  There are so many more ideas out there.  I wanted to show you what works for me, and to see how easy it is to have something healthy and something quick at the same time.  Who said we can't have it all!  I want it all!  So here are my favorites!


Green Container - 
carrots
celery
snow peas
cucumbers
cherry tomatoes

Purple Container - 
grapes
berries(blueberries, strawberries, raspberries)
sliced apples
cherries
banana

Red Container - 
Hard boiled eggs (we take these on the run all the time, they are my kids favorites)
Greek yogurt
Cottage Cheese
Can of Tuna
Shakeology


Yellow Container - This can be the easiest to grab on the go, but remember you don't get very many of these in the day.
small whole wheat tortilla
air popped popcorn
small whole grain crackers

Blue Container - 
Almonds
Cashews
Mozzerella cheese stick

Orange Container - 
Peanuts

These are all easy to mix and match too.  If you wanted you could dip the fruit in the yogurt.  Or put some peanut butter on the crackers.  My kids are always running out of the house with a few crackers smothered in Peanut Butter.  You don't have to make any of this complicated at all!  The key is to just do it!  Did you know that healthy people, not skinny people, will eat the same foods and just rotate through them.  They know what works for them, so they don't change it!

So don't forget to have your containers ready to go for the day, or just throw your goodies in a baggie!  No need to stop at the drive through, or gas station.  Most importantly though, don't forget your water!!  You need to be drinking half your body weigh in ounces.  Take your water with you.  I have found that if I am hungry and know that it is a snacky hungry that I just need to catch up on my water.  So I will drink a glass of water and feel so much better, and proud of myself for not grabbing that yummy cookie I have laying around for the kids.
Photobucket

Tuesday, September 23, 2014

Happy Dance

Today was a pretty awesome day for me. I needed a new pair of jeans. With mine already taken in and then repaired one to many times and I couldn't keep up with the holes. And they were looking pretty baggy. So I took some time for myself and tried on pants. I went down 2 pant sizes!! Eek!!! I want to dance! I actually did when I was chatting with the girl helping me. Thanks to my second round of the 21 day Fix! 

What beachbody programs have you bought?

What programs have worked for you? 


Tuesday, September 9, 2014

Eating Clean


I have decided lately to take more time for myself!  I had been spending too much time worrying about the next great pattern, and ignoring myself and my family.  I had mentioned in a post earlier this year, that I need to take some time away from my sewing machine to focus more on my family.  Well I did that, and loved it!  I have really enjoyed my kids, and we have spent some great time together.  I still have been sewing, but only a few custom orders for people, and for my kids and myself.  I don't think I could ever stop sewing, I love it too much.  I feel relaxed while I am sewing.

Anyway, to get to my point of why I decided to post today.  I am so excited, that I have been feeling so wonderful for the past year.  My husband and I have been doing our homework to learn what is in foods and what we should and shouldn't be eating.  I had heard some of the most fabulous transformation stories from people.  I am so impressed my what I have learned!  So our family has been trying to eat clean for the past year.  Sometimes it is hard not to pull something out that is processed, but I can say that I have very little processed foods in my home now.

I am continuing to learn more about eating clean, and I also feel like I know enough to be able to help someone else wanting to eat better too.  So I thought that why not do this with friends!  I am going to start a challenge on facebook for anyone that wants to join in!? 1 WEEK OF CLEAN EATING! We will share recipes, ideas, information and facts about foods, eating clean, It will be the perfect place to motivate each other, share challenges and triumphs. I will start the group in a pre-season on Sept 15th to help get everyone ready for the official start day on Sept 22nd. Who's in?

If you are in, leave me a comment below and a way to contact you.  Or send me an email.  My email address is found on my contact me page!

Tuesday, August 19, 2014

Golden Rippy

I am always asking for testers, but this time I got to be a tester!!  This was so much fun, I loved this chance to make this top for Rachel with Golden Rippy.  Not very often do I get time to sew for myself.  Getting the pictures after I had made this was the hard part though.  I tried to get my kids to take pictures for me, but hello double chin!  I found one that they had taken that showed the top good so you could see without fingers or sunlight in the way.  So then I ran over to my good friends house and had her take one for you.  That way you could get a good picture of how the top turned out.


The Delilah Top is the grown-up version of the  Dahlia Top in the Golden Rippy shop.  It comes in sizes xxs - xl.  


With great instructions and such a quick sew, I was so proud of how my top turned out.  The Delilah top comes with two embelishment options.  I chose to use the bow option and place it over my right shoulder.  If you would like to see the other option, please stop by Golden Rippy's Shop.


I think this top would be perfect for a beginner to learn to sew on knit fabric.  It a fun quick sewing project that can be made in a day, and worn the next!  I made my top back in June, and I have worn it a bunch of times since.  I have had so many compliments on it everytime!  Gotta love the attention when we look good, right!  My daughter really love this shirt, so I am thinking I will need to be making the girls version, Dahlia, very soon.  Make sure to stop by and check out the Golden Rippy blog.  Rachel has recipies, tutorials, and more patterns to share!!

Thursday, November 28, 2013

50% OFF and Stocking Stalkers

Are you a stalker of My Taylor Made sewing patterns?  Do you want new Stalkings for Christmas this year?  Are you a sucker for contests?  And do you want to win free sewing patterns from a bunch of designers?
IF so, here's the plan: Choose a designer or a pattern you love, one that speaks to you, one that moves you, one that inspires you. Then, take our FREE STOCKING PATTERN and put the two together. How? You figure it out. Turn your stocking into a love song for Ellie Inspired. Sew up a message in a bottle for Tie Dye Diva. Compose a handmade,  heartfelt sonnet for Foo Foo Threads.  The only tools you need are your imagination, your sewing machine, and the stocking pattern.   You can read more about the contest here - 
 Robin Hill's photo.

More great news for you.  All patterns in my shop will be 50% off all day on Black Friday.  The only other time to be able to take advantage of this is when a new pattern comes out.  So this is a great to take care of those patterns that have never been 50% off.  Use coupon code BLACKFRIDAY  for every pattern purchase in my shop!

Happy Thanksgiving to everyone!  I hope you all have a wonderful time with your families!

Sunday, November 17, 2013

Designers Challenge and Coupon Code


 1395929_10201810557238416_1937497111_n.jpg
When I joined a Facebook group for designers, I was so excited to be able to work with other designers.  It is kinda intimidating to see how much talent is in this group.  Seriously!  Amazing ladies!!  One day Andrea Panell suggested that we put together a challenge.  A challenge to get all of us to break out of the box.  Design something new, that may be a challenge to us.  So here is the list of designers and their release dates for the Challenge.


I of course thought what a great idea to be one of the first and get it done.  Well I kinda ran into a snag this weekend, and found out the pattern that I had hoped to use in this release was perfect.  But with a snag, I have decided that I better fix it first.  I hate to rush and not have it right.  But I do have a pattern in my shop that I feel is perfect for this challenge.  I would have to say it was the most challenging pattern that I have ever made.  It took me the longest to get this pattern right.  I'm not gonna lie, it actually took me almost a year to get it right.  But I am so excited to have it out in my shop this last April!

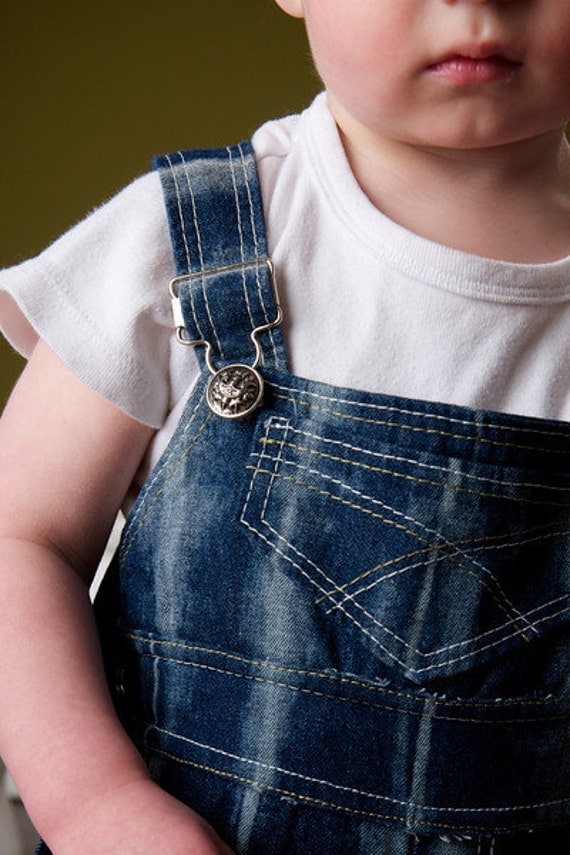
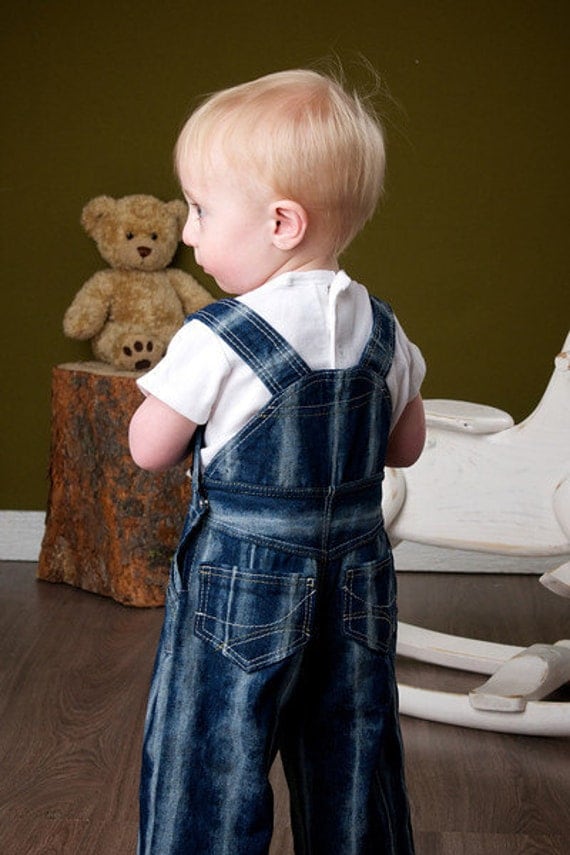
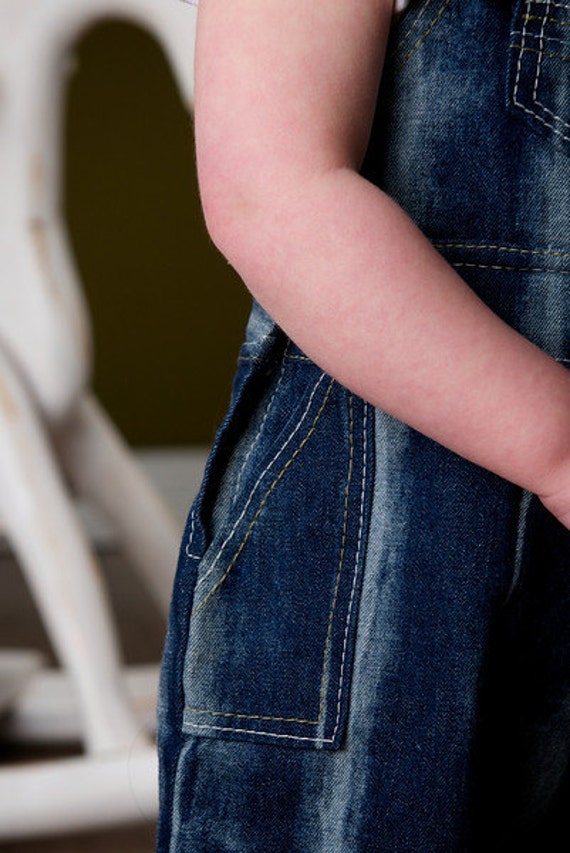
With this Designers Challenge I was taken out of my comfort zone the most with the Tyler Overall!  I will be offering the Tyler Overall for 1/2 off for All of Monday and Tuesday.  Make sure to grab it now. 
Use Coupon Code PANT12 to get it 1/2off!!

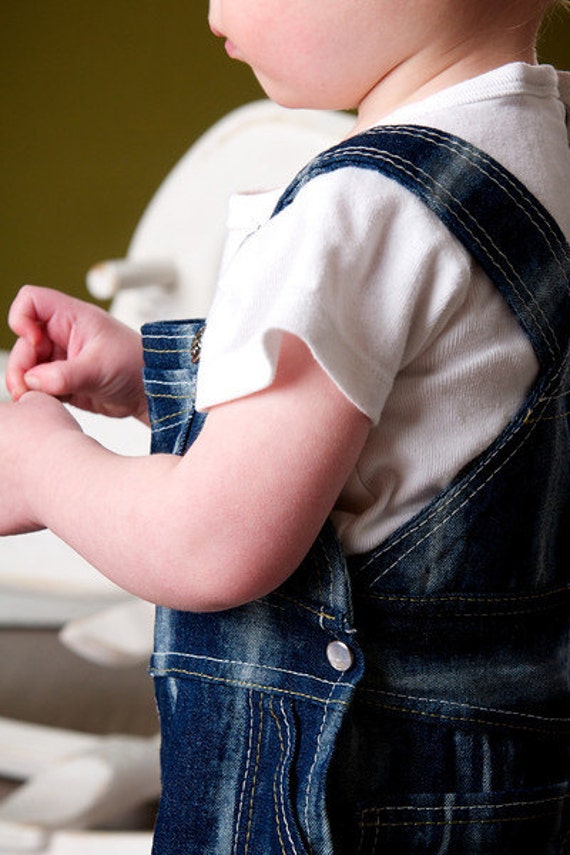
 Overalls are perfect for everything,right! Every boy needs a pair, they just look so cute in them. Great for baby pictures, just to wear out and about, and of course to just be a boy and play in the mud. I would love to see this made in a pink denim too, for that sweet little princess.
Pattern comes in sizes 3 month to 24 month.
More Great news!  If you would like to get this pattern for free, make sure to stop by Pattern Revolution and enter the drawing.  Robin will have a drawing for each designer when they release their patterns, make sure to stop in each day for a new pattern.

https://www.etsy.com/listing/152523687/boys-overall-pdf-sewing-pattern


Saturday, October 5, 2013

Costume Contest

Yeah!  I am so excited!  I get to be a judge in a costume contest!!  A good friend of mine, who I meet here on the internet has recently started designing sewing patterns.  I am so excited for her.  I have to tell you a little about Frances.  She is a busy homeschooling mom to her son and her daughter.  After supporting her husband with his busy job, she makes sure to make the time for sewing and pattern making.  Frances is definitely a go getter!
Now to tell you about the contest.  Frances just finished her 2nd pattern and has her test group holding a contest to determine the uniform that most closely resembles the actual uniforms worn by the players. The prize is a $25.00 gift card to JoAnn Fabrics. The winner will also choose any item up to $35.00 from
https://www.etsy.com/shop/sonjayugoslovenka
To check out the new pattern and details of the contest go to her blog here, http://www.muffinheadpatterns.com/blog.html 
Here is a picture of the newest pattern.  I have downloaded mine and as soon as I get some orders out, I plan on getting started on a dress for my daughter.  I can't wait!
Doesn't it look like the uniforms in "A League of Their Own!!!"   So Cute!

Wednesday, September 25, 2013

Sweater Vest Pattern Testers

It is always exciting to add a new pattern for the little boys!  This pattern is for a simple vest.  No button holes, no buttons or snaps.  Just quick simple steps.  Can be sewn using a sweater knit, basic knit fabric, jersey knit, if the fabric has stretch it can be used.  My son even thinks that this could be a tank top pattern too.  Great for all occasions!  Sizes available will be 12month to 12 years.  I think this sweater would be great for the Holidays in a sweater knit with a tie underneath.  I love the cute little boys all dressed up!


I am in need of pattern testers!!  I am looking for 4 people to test this pattern for me.  If you would like to test this please follow the giveaway instructions below.  Here's the deal for you. You get the pattern for free. I only ask that you are able to sew the dress within a week of me emailing it to you, and give me any comments or suggestions you may have.  I will attach a comment form for you.  To select the entrants I will do a drawing through Rafflecopter.  Then I will check to make sure all entrants are able to test different sizes.  If you have any reason that you think you may not be able to get it sewn in time, please do not enter the raffle, I do need this done in time.  As soon as you have tested the sewing pattern as a thank you to you for your help, I will send you another free sewing pattern of your choice from my shop.  Here is a link to my shop to check it out - https://www.etsy.com/shop/mytaylormade
Usually I have the contest last for 1 full week, I have decided to shorten that because I have noticed that it isn't needed to have it so long.  So this time the contest will last until Sunday night at Midnight. So starting Wednesday September 25th at midnight then ending at midnight, on Sunday, September 29th.
a Rafflecopter giveaway

Friday, September 20, 2013

Follow Me Help!?

Ok, so I am a dork!  I can not for the life of me figure out how to fix my Follow Me buttons on the right side of my blog!!  What is my deal?  I have gone to Facebook, Pinterest, and Twitter.  I thought I was following the instructions correctly, but the only one I can get to work is the Twitter Follow Me button.  WHAT AM I DOING WRONG!  I need help, how did all of you great bloggers get yours to work and look so awesome!?  HELP, PLEASE!!!

Thursday, September 12, 2013

Quick, Easy, and Cheap Halloween Costume

If you have been following my blog for a while, you have seen these pictures before.  I thought I would share with you a quick, easy, and cheap way to make a fun Halloween costume for the kiddos this year.  When I made these costumes I was really concerned to have costumes that were warm and could have a coat worn underneath.  Sometimes the saddest part of Halloween is when they have to wear a coat over top a costume.
 Larry the Cucumber from Veggie Tales

Bob the Tomato from Veggie Tales

 Pig

 Cow


I had fun making these costume.  I loved how quick and easy they were for me to make.  Any animal can be made with these.
 It is a really simple costume to make and can be done in a day of it doesn't have a ton of detail.  I wish I had thought to put it in a tutorial for you with pictures, so sorry.  If I get the chance to make another one, I will share my secrets with you!
All it is is a yard of felt fabric with elastic around the top for the neck, arm holes on each side, and some of them have elastic at the bottom to make it more round.  When I added the eyes I drew them out on paper first to make sure I liked them.  When I sewed the eyes, and noses on I added stuffing inside to give it a fun bubble look.
 I was supper happy with these, and how they turned out.  Anything to make a child happy on such a fun day!