Monday, December 19, 2011

Princess Dress Just In Time For Christmas

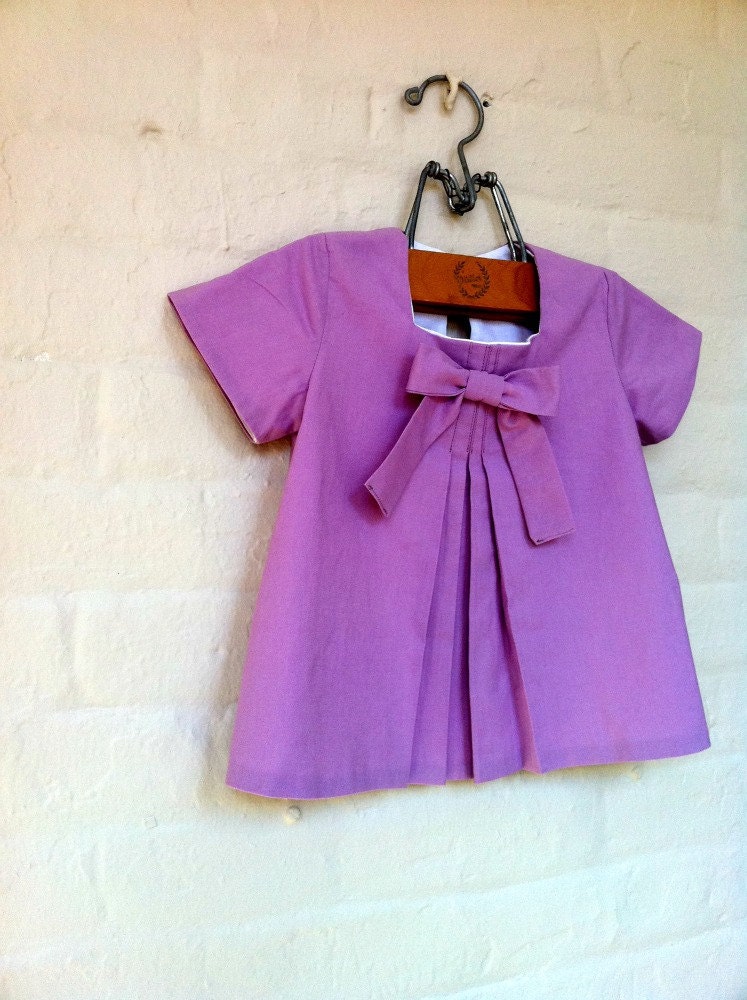
I just finished working on my newest pattern.  I am so thrilled about this dress.  It is truly made for a princess.  The pictures I have here are not the best because I had to secretly get the picture.  I made 2 for Christmas gifts for my daughter and niece.  As soon as the beautiful models see their dresses, I will provide you with better pictures.  These pictures don't do the dress justice on how pretty they turned out.
I am not yet needing pattern testers for this dress because of the busy time of year.  I thought I would share it with you though so you can get ready.  I would love to get your opinion on a time that would be best to post the drawing to test this.  A couple days after Christmas or should I wait until after the new year.  You let me know! 
If any of you are interested in this pattern before Christmas let me know.


Saturday, December 17, 2011

Some of my Christmas Favorites


I love this time of year!  Year by year we will add more traditions in our home, and last year I added all three of these recipes to that.  Merry Christmas to all of you, and I hope that your holidays are wonderful!!
Feta Salad
12 oz mixed salad greens(I used fresh)
2 fresh pears, cubed or sliced
1/2lb. fetta cheese, crumbled
1 c. craisins
1 c. camelized pecans - pour 1/3c. white sugar and 1 c. pecan pieces into sauce pan over medium heat.  Stir constantly until sugar melts and becomes sticky and light brown.  Watch Carefully!  Remove nuts immediately to a plate to cool.
Dressing -
1/2 c. red onion
1c. sugar
2 tsp. Dijon Mustard
1tsp. salt
2/3c. white vinegar
2c. veggie oil
3 Tblsp. poppy seeds
Mix 1st 6 ingredients in a blender, stir in poppy seeds at the end.
Lemon Water
1 Tbsp. lemon extract
1 Tbsp. citric acid (get at the pharmacy, sometimes they will need to order it in)
3 c. sugar
5 qts. water
lots of ice
If you can't find citric acid, "true lemon" crystalized lemon substitute, you will have to use 3 times the amount, you can also add "real lemon" concentrate.
MIX
This was fun to make, and I got the recipie from my Family Fun magazine.
Gingerbread Trifle
 click on the picture for the link to the recipe with Family Fun.

Merry Christmas to all of you.  Thank you for all the support you have given my blog.
I would love to know a tradition of yours this time of year, please leave a comment and share.

Thursday, December 8, 2011

Digital Designs Giveaway

Another giveaway!!
My little sis, has just started her own Etsy shop, Digital Designs.  I am always amazed with her, she is just so talented.  Years ago, our parents had bought both of us a sewing machine for Christmas.  We were both taking lessons.  Tiffany used hers for only a little while, but she didn't enjoy it.  Tiff has always been creative, so now she takes fantastic pictures (which I think she needs to sell some on Etsy), and now digital art.  I was lucky to have her design my sewing pattern front page.
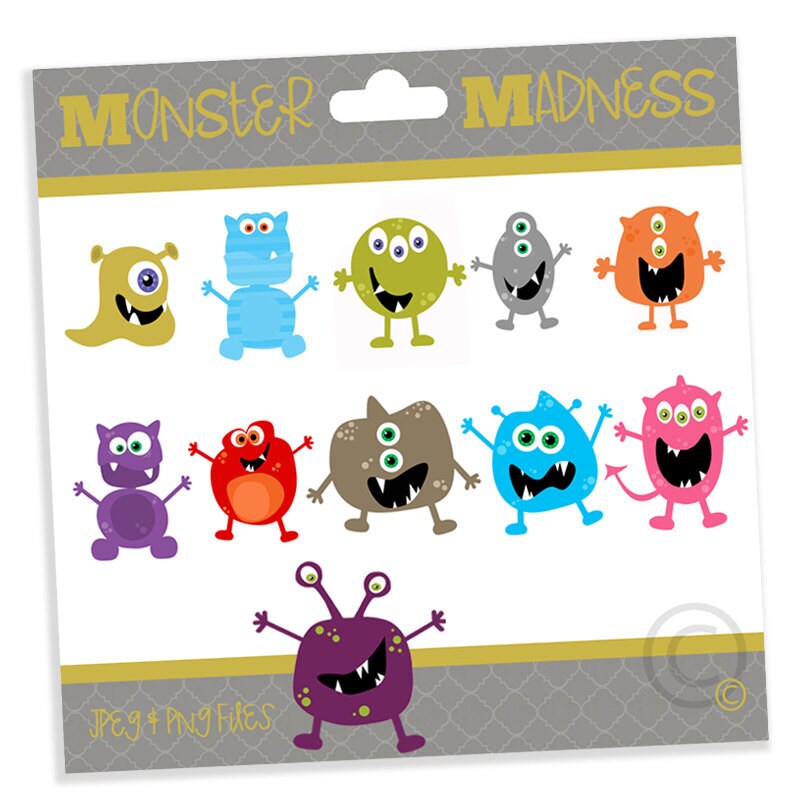
Tiffany is giving away her most popular Digital Print, Monster Madness.  My oldest son's favorite is the 1 eyed monster, and my daughters is the purple.
Make sure to stop by and check out Tiff's facebook page and website for her pictures.  They are gorgeous!
To win this addorable Clip Art  -
please leave me a way to contact you in your comment, you must be a follower of my blog.
For 1 extra point for each of these ways - 
you can follow my blog
Please support Tiff of Etsy and like her shop

Like me on facebook and twitter
And for 5 extra points if you blog or facebook about this and leave me a link to see!
Giveaway will end next Thursday night at midnight.  December 15th.
Don't forget the deal you get with Crafty Lil Fox, check out my giveaways page!

Saturday, December 3, 2011

Re-purposed Block Stocking Hangers

I have been wanting some stocking hangers for a long time now.  Every year we end up putting our stocking under the tree until Christmas Eve.  Then the kids play with them, and run off and scatter them all over the house.  It drives me crazy to pick them up all the time.
I can never decide on the stocking hangers that I want.  Or the ones I fall in love with are kinda expensive.  So I thought I could re-purpose some blocks.  These blocks had some cute saying on them, but they never matched anything I had so they just sat in the closet.
I was feeling crafty!  I love those days!


Here is how I made them:
I used some blocks I already had. If you want to make these and don't have any pre-cut blocks, go buy a 4 x 4 at the local lumber store.  Then cut into squares.
I lightly sanded down my blocks so they were not rough.
I painted with craft paint the entire block.  I only used 1 coat of paint, but you may want 2.
I found a cute font on the computer at this 1001 free fonts.  I used Angelic War.
I typed the Christmas words that I wanted.  Joy, Noel, Peace, Love, Faith
Make sure the font size will fit onto a 3 1/2" square.
Print onto Christmas colored paper.
Cut out to size of block.
Mod Podge the paper onto the front of the block.
When dry, Mod Podge over top of the paper.
When dry, lightly sand the edges of the block around the paper.
Use an antiquing stamp or stain around the edges of the paper.
Screw some small hooks into the front of the block.


It was so quick and easy.  I got it all done in one day, as I was running around doing other things as well.  Since we don't have a fireplace to hang our stockings on, I thought I would hang them on our shelf that usually holds family pictures.  Now all I need to do is make some matching stockings for all of us.  If you have any cute stockings you have seen online, please let me know.  I have been looking on Pintrest and found a few.

These are not the best instructions, no pictures.  So if you want to make these and need some help, send me a note!

Merry Christmas everyone!

Don't forget about the great deal offered to you by Crafty Lil Fox.  And stay tuned I will be having another giveaway next week!

Friday, December 2, 2011

Win Win with Crafty Lil' Fox

I feel like a whole new person!!  I am sure you have noticed the new look of my blog.  I was so lucky to have found Melissa with Crafty Lil' Fox.  She has totally revamped my blog, and I think it looks amazing.  the blog now has pages to find things better.  The colors are so light and fresh, I am so excited!  I wish I could say that I helped come up with the ideas of how the blog turned out, but I can't.  I owe all the credit to Melissa for doing such a fabulous job.  She really pinned me to a T, with my style!
If you stop by the Crafty Lil' Fox blog, you will find some great tutorials, freebies, look through Melissa's portfolio, and so much more.  Don't forget to stop by and favorite her on

Here is a little bit about Melissa in her own words - 
I'm a craft addict, web designer, copywriter and world traveller! I started Crafty Lil Fox to share tips and hints for selling online, marketing small and home based business online, using creative blog designs and successfully building craft and handmade businesses. When I'm not creating beautiful blogs, my favourite crafts are crochet and sewing and I'm a bit obsessed with beautiful homes.

I am so excited to tell you that you can have a great blog too! Melissa is offering all of my readers $50 off any custom blog design and 25% off of any orders from her Etsy shop. You just need to mention that you saw the offer on my blog.  Everyone is a winner with this one!  This offer will last through the rest of December and all of January.
 

Thursday, December 1, 2011

Winner of Made Just Wright Giveaway


We have a winner!!
Shannon Foust

Thank you for entering.  I gave your information to Andi, and she will be contacting you.

Make sure to come back tomorrow for another lucky win!!  I am guessing you have noticed the changes in my blog!  This is a hint as to what you can get tomorrow.

Wednesday, November 23, 2011

Made Just Wright Giveaway

You have heard me say it before, that I Love the chance to get to know other people on Etsy and other creative sites!  I am lucky to say this time though, that I have known Andi with Made Just Wright for a while now.
We were so lucky to have met when we both had moved to the desert in Arizona, to support our husbands jobs.  If you have never been to the hot part of Arizona, you are pretty lucky.  It would get pretty hot!  During the summer the temperature would get up to 130 degrees easily.  Thank heavens for pools!!!  I actually did love it there.  We met some to the best people there, and I had a tan almost year round!  Anyway, a bunch of us moms would try to get together on occasion and create!
Andi and I both had tiny baby girls that needed some extra flair.  So we made bows!!  Andi is a pro, she makes the cutest bows.  And one luck winner will get to win 2 crochet headbands, 1 large flower, and 1 bow.

 How cute HUH!!  If you want to win here is how-
To enter the drawing please leave me a way to contact you in your comment, you must be a follower of my blog.
For 1 extra point for each of these ways - 
you can follow my blog
Follow Andi's blog
Like me on facebook and twitter
And for 5 extra points if you blog or facebook about this and leave me a link to see!
Giveaway will end next Wednesday night at midnight.  November 30th.
Don't forget to check out her blog to see some of the other cute things she makes, here are a few of my favorites!

If you are in a giveaway mood, make sure to stop by Barefoot By the Sea's Blog, Jessica from Posies in My Pocket has more giveaways going on there!

Tuesday, November 22, 2011

Posies In My Pocket Winner!!

We have a winner!!! 
Waasabi!
I will give your email to Jessica and she will get with you.
Thank you everyone for your support with this giveaway, it was a ton of fun.  I will be posting another wonderful giveaway tomorrow!  So stay tuned.

Monday, November 14, 2011

Posies in My Pocket Giveaway

Another fun giveaway!!  I am so excited to do this giveaway for you.  I have loved Jessica's shops and blog for a long time now.  She definitely has one of those blogs that are worth checking in on as often as you can.  Jessica always has some fun ideas for recipes, really fun giveaways all the time, and some super cute posts about life and her kiddos.

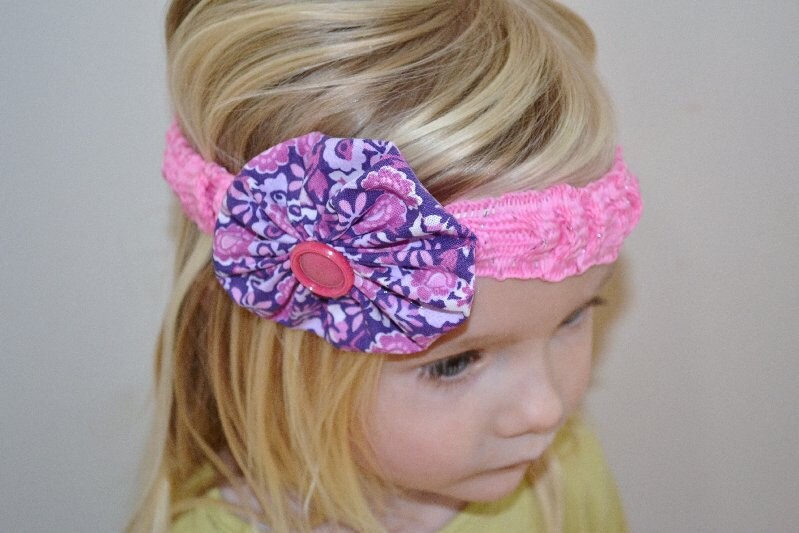
Jessica is the proud owner of Posies In My Pocket, which is an accessory shop full of vintage inspired goodies.  She handcrafts each piece with nickel free metal.  Jessica offers headbands, hairpins, earrings, rings, statement necklaces and more.  She crafts with a variety of materials including vintage fabric, resin, wool felt and more.
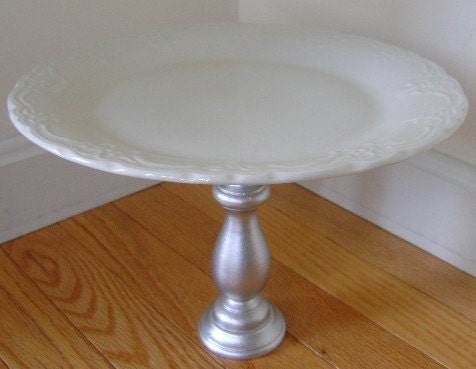
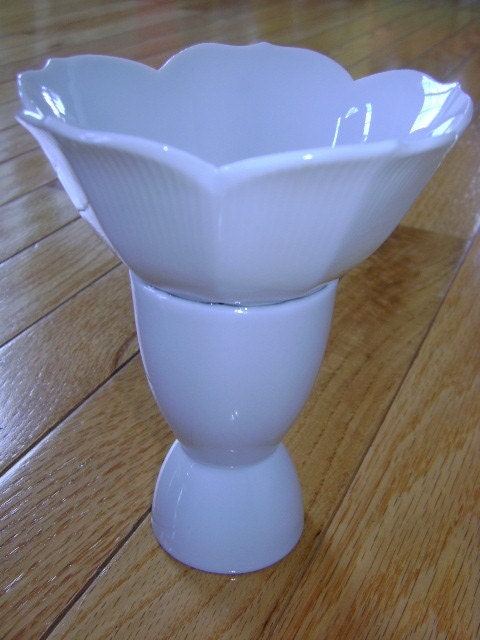
If if that wasn't exciting enough is also has a sister shop, Posie Hill Farm, which has vintage inspired items for the home including cupcake stands and cake plates.


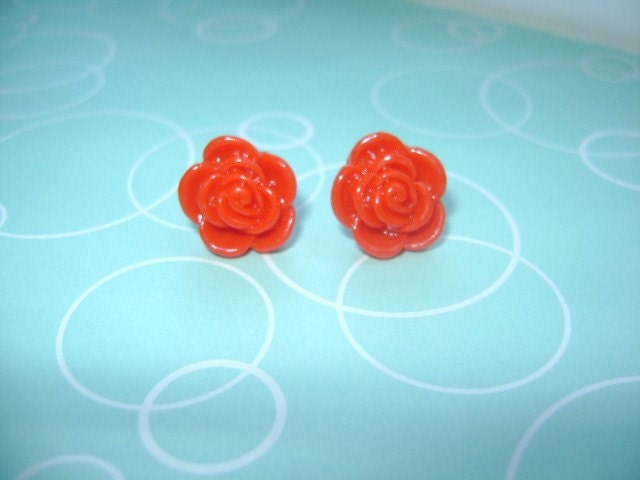
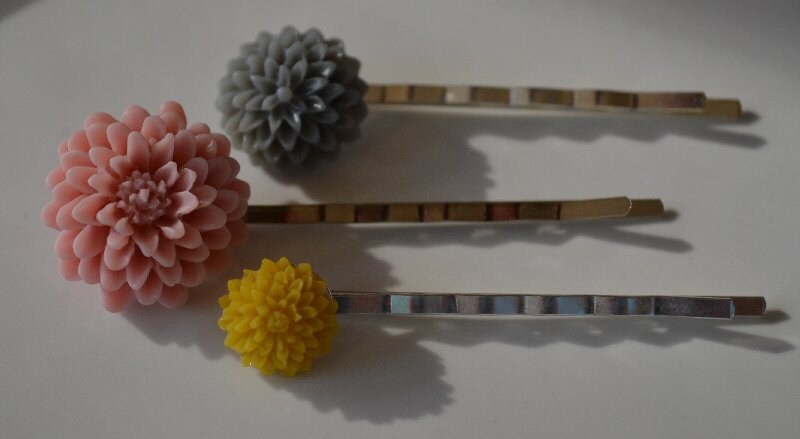
Now for the exciting giveaway!  Jessica is giving away this beautiful pair of Rosy Red Earring and a hairpin set.

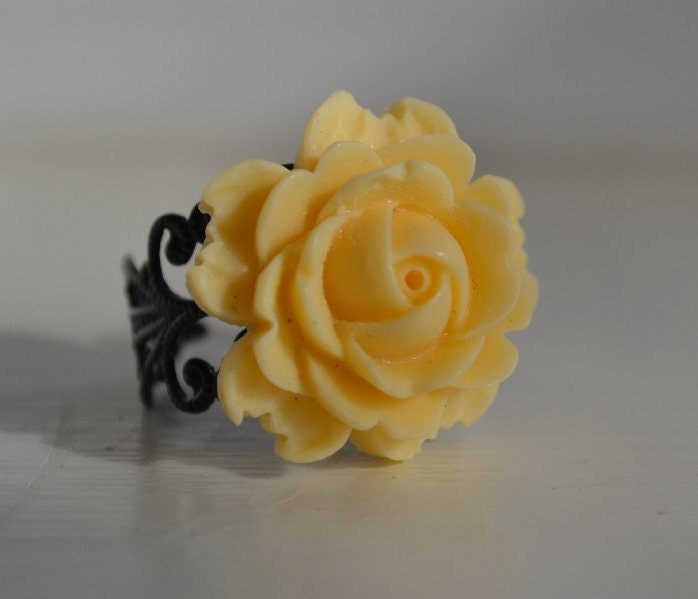
Here are a couple more pictures from her shops of some of my favorite items!
Jessica is also willing to offer a 15% off coupon code to one winner when they convo her on etsy with the code 1000 SALES!!!

So you have the opportunity to win now and win in one week!!

To enter the drawing please leave me a way to contact you in your comment, you must be a follower of my blog.
For 1 extra point for each of these ways - 
you can follow my blog
Follow Jessica's blog
Like me on facebook and twitter
And for 5 extra points if you blog or facebook about this and leave me a link to see!
Giveaway will end next Monday night at midnight.  November 21st.


Saturday, November 12, 2011

Winners of Pattern Package Giveaway

Hooray!!  We have the 1st winners of our celebration giveaway!
Mattsmom
MamaLusco
Andi
Congrats ladies.  I am so excited for you!  I will contact you and get your email, be thinking of the 5 patterns you want.
Come back and check the next giveaways, and win something from some fantastic shops.  I will post the next giveaway on Monday morning!

Friday, November 4, 2011

1st Giveaway

Ok, here is our first giveaway for my celebration!  I thought it would be best to start with a giveaway from my shop!  Thank you again for all of you that have been wonderful supporters of my patterns.  Thank you to all of you that have tested my patterns and those who have been willing to and haven't won yet.  I have a couple new patterns that I will bring out this month as well.  We will have another dress just in time for the holidays, overall pattern, and I am hoping to get a new purse pattern done as well.
Alright, enough chit chat!  Here is the giveaway!
3 Lucky readers will win my 5 Pattern Package.  You choose any 5 of my patterns and you get them for free!
 here is a link to my shop so you can look through the patterns and find the ones you would like.
 This is how you can gain points to win!
1. Leave me a comment saying you follow my blog with your email
2. Leave me a comment saying you following on facebook  www.facebook.com/mytaylormade
3. Leave me a comment saying you follow me on Twitter
4.  And if you would like an easy 5 points, please make a blog post about this post, facebook it, or twitter it.  When you do this tell everyone that you sent them, have them let me know who sent them to my blog and you can get even one more point in the drawing!
3 Winners!
10 Entries in the drawing are possible!
Drawing will end a week from today on Friday, November 11th at midnight. 


Wednesday, November 2, 2011

Come Join my Celebration


I hit
sales in my shop!

I want to celebrate with you!  I will be hosting some giveaways here on my blog over  the next month or so!!

Keep checking back throughout the month to see what you can win.

I will post my 1st giveaway in the morning.

If you are interested, or know of anyone interested in doing a giveaway please let me know.

Wednesday, October 19, 2011

Hiding Stains, free tutorial


More shirts have been stained in this house!!!  I hate having to buy new shirts when a perfectly good shirt has a small stain.  So I came up with a solution!!  A printed T-shirt.

I wanted to share this tutorial with you to help save your sanity as well!  It is actually a ton of fun to do!  And I feel so thrifty!  This is my second try at this, the first time I spayed the shirt it didn't work out.  But no worries, that shirt is used for jammies now!  I actually have 2 shirts at the end for you to see the difference.

Supplies needed:
T-shirt or fabric of choice
Freezer Paper(found at grocery store)
Cardboard(I didn't have any on hand so I used more freezer paper)
Fabric Paint(I used a spray the first time and it leaked through so I used a paint brush the second time and it was wonderful)

Here is a picture of the shirt I used.  With the stains included.

 Step 1:
Draw and cut out the image that you would like on the shirt, using the freezer paper.  If you are not an artist no worries, there are plenty of clip art images out there that you could use.  Make sure when you are putting your image on the freezer paper that the wax side is down.

Step 2:
Iron the freezer paper onto your shirt.  Make sure you have it on really well, if not the paint will leak through and your image will be smeared.  I added some of the extra pieces of freezer paper to cover the other areas of the shirt, but if you would like you can just tuck this underneath when spraying.

Step 3:
Before you paint your image you will need to add some cardboard or more freezer paper in between both layers of the shirt.  This prevents the image from leaking to the back side.

Step 4:
Make sure you follow the directions on the bottle of paint that you have, they will help this to be successful for you.  Spay or paint your image, making sure not to use too much paint.  Let dry for at least an hour before taking off the freezer paper.  My paint said not to wash for 48 hours.

Now you have a shirt to enjoy!!  I have 2 shirts shown because the one with the bird print I used the spray on and the spay leaked so I added the pink strip across the  top to hide the leak spots.  I think it turned out great!  The shirt with the hearts was the shirt that I used only a paint brush on and it worked out really well.

I would love any suggestions any of you may have on the spray paint.  I love the idea of using it instead of the paint brushes, but I don't know how to get it to not leak.


Photobucket

Wednesday, August 17, 2011

The Fox, Made it to the front page of Etsy

As most of you know, Etsy has the chance to put Treasury lists together of some of our favorites. I recently put this treasury together, and it made it to the front page of Etsy!! How exciting!! I was so thrilled when I woke up this morning!!


Photobucket

Thursday, August 11, 2011

KyandKin

I was very lucky to have Heather with kyandkin test the Olivia Dress pattern for me.  She is absolutly amazing, so talented.  Please take the time to read her bio here and then go check out her shop!!  Here is a picture of the Olivia Dress that Heather made.  I love how she used the white for the collar, cuffs and belt!  Beautiful!!

kyandkin is a small business that creates handmade children’s clothes and necessities. I have always loved the soft colors of baby & children’s clothes and the free flowing comfortable feeling of clothes, and have put the two together to create kyandkin.


I live with the idea of quality over quantity, and take time with each item as if my own children would wear them. The pieces are sewn completely with a machine and have zig zag stitching for secure seams in place of a serger for that extra durability and handmade touch.

I started kyandkin with the inspiration from my 2 beautiful daughters, Kylie Rainn and Kinley River. I am a military wife of an amazing husband who serves as a Riverine in the Navy. My family is absolutely everything to me and they have inspired me to start something that would last forever, something small...growing into something big...

I wanted to make clothes for my girls and other children that were something a little different from the norm, something that they are comfortable in and something that they can run and play freely while still being able to look stylish. I always fall in love with particular styles that are way over priced and can never afford them, and due to the fact that children grow so fast, I always thought it would be a waste of money…so with that in mind, I started to make clothes that I would’ve loved to wear as a child and be good on the pockets as well.

Most of my supplies are either from local shops in town, online fabric stores or, my favorite, other etsy shops, to help other etsy owners build their businesses as well. I love the diverse options, overwhelming creativity and friendly people that I have talked to through etsy, just over the last few months. It means so much to me to give back to others, and watch sales grow for shops trying to make it as well.

I had sewn for years, and had started with selling handbags to friends and family a few years ago…but I knew that there was something else that I was even more interested in but just couldn’t put my finger on it…until I had my second little girl. I had finally found something that I LOVE to put my time and effort into, something that I just can’t get enough of. The time I put into my shop is time that I love to put aside, something that’s freeing, a little “outlet” of mine where I can relax and take in my day piece by piece. I use every opportunity to get a little work done, whether it’s early in the morning before my girls wake up, during a nap or after they’re fast asleep. My business is a dream that I can’t stop thinking about, which is what I always wanted for myself.
Make sure to visit KyandKin.  She has such beautiful and well made items in her shop.  She is truely talented!  Also visit her on facebook and leaver her a note!


Photobucket

Wednesday, July 27, 2011

Olivia Shirt Dress, Pattern Tester

Time to get ready for school!!  As much as I am not too excited about it, I have to jump in a get going.  So here is my 1st dress pattern that will help welcome us back to school, the Olivia Shirt Dress.  This dress is perfect for those girls who don't want to wear pants, and it gives them that preppy girl look!!  The dress comes with an option of long sleeves or short sleeves.  Belt and belt loops.  Buttons all the way up the front with a cute yoke around the neck line.  Pattern comes in sizes 2 - 7 for the little girls.

Long sleeve option -


short sleeve option -


I am needing 2 people to test this pattern for me. If you would like to test this please leave me a comment below. If you would like an extra point in the drawing, please leave a comment on facebook or twitter and leave me the link to see it (I would appreciate your help in telling people about my shop).  Please leave me a way to contact you if you win!!!
Here's the deal. You get the pattern for free. I only ask that you are able to sew the bag within a week of me emailing it to you, and give me any comments or suggestions you may have.  This is very important.

Contest will end at midnight, on Wednesday, August 3rd.


Photobucket

Friday, June 24, 2011

T-Shirt Skirt FREE Tutorial

I started looking at my daughters old shirts one day.  She had so many shirts that either had a stain right up front or I didn't love enough for her to wear more than once or twice.  Those of you who come to my blog often know how much she loves skirts!!  So we decided she needed a new skirt!!  And I wanted to share with you how we made this skirt.  It was simple, fun, quick, and didn't cost a penny to make.  Give it a try, you will love the skirt, it washes great with no wrinkles and is perfect for play.  No serger needed, and no need to add an elastic to the waistline!!!
<br>
 Start out going through your closet and pulling out 5 or 6 old shirts.  Notice that I have used a tank top, polo shirt, and basic t's.  You will also need an old pair of leggings.  If you don't have leggings, any old pair of pants would be just as cute!!
<br>
Cut just underneath the sleeves on all the shirts.  Don't worry that some will be taller than others.  Throw away the top.  I am using this ruler, and it definitely is wonderful, but don't worry if you don't have one!
<br>
Cut off the side seams.  Throw away the side seams.  We are keeping the hem of the shirt on, so make sure not to cut it off!
<br>
Cut into 3 even rectangles, with the shirts hem at the bottom of each.
<br>
Lay out all the rectangles from all your shirts into how you would like them for the skirt.  Some of the shirts are taller than the others, this is just fine, we will fix this later. 
<br>
Starting at the shirts hemline, sew 1/8" seam allowance up the side of each rectangle.  Sew with the ugly side of the fabrics together, making the seam show on the outside of the skirt. 
<br>
This is what it will look like as you start to add more rectangles together.  Keep going until you sew the first rectangle to the last, making a circle.
<br>
Cut the leggings somewhere above the crotch.  This is up to you where you want to cut, the main difference it will make is the length it adds to the skirt.  Throw away the bottoms.
<br>
To get the bottom of the skirt ready for sew to the top, cut the extra lengths from the rectangles off the top.  This will make a nice edge to sew to the top of the leggings.  You are not cutting the edge that has all the original hems from the shirts.
<br>
Make a gathering stitch at the top.  To do this set your sewing machine at the longest stitch length you have available.  Then sew 1/8" away from the edge then again at 5/8" away from the edge, all the way around the top.  Make sure not to back stitch at the beginning or to stitch over top the same stitches.  Keep your threads at the beginning of the stitch and the end of the stitch long.  You will be pulling these strings to make the gather soon.
<br>
Separate the legging top and the skirt into fourths and place pins. 
<br>
Pull the top threads of the gathering stitches.  Do not pull the bottom, just the top.  If you pull the bottom and the top you will end up breaking a thread and have to start over. 
<br>
Match the pins that you placed in the leggings and the skirt together so you have the fourths evenly placed.  Make sure the fabrics have the ugly sides facing each other so the seam will show on the outside of the skirt.  Then play with the gathers to make the skirt the same size as the leggings.  Place a lot of pins.  The more the pins the better, they will save a lot of frustration!
<br>
Sew as close to 1/8" seam allowance as you can around the edge.  Then pull out the gathering stitches so they don't show on your skirt.
Yey you are done, and it looks fantastic!!  New skirt at no extra cost!!!


Photobucket